前 言
大家好!这是我的第一篇博客。
在我开发ElbowEngine时,一个调试界面是及其重要的。最后我选择了ImGui,这里来向已有代码中集成ImGui。
代码变化在RickSchanze/ElbowEngine at 集成Imgui (github.com),其中”集成ImGui”分支便是本篇文章讲述的所有集成工作的代码。
之前的效果
在集成之前,我已经成功实现了向glfw窗口中显示3D模型,如下: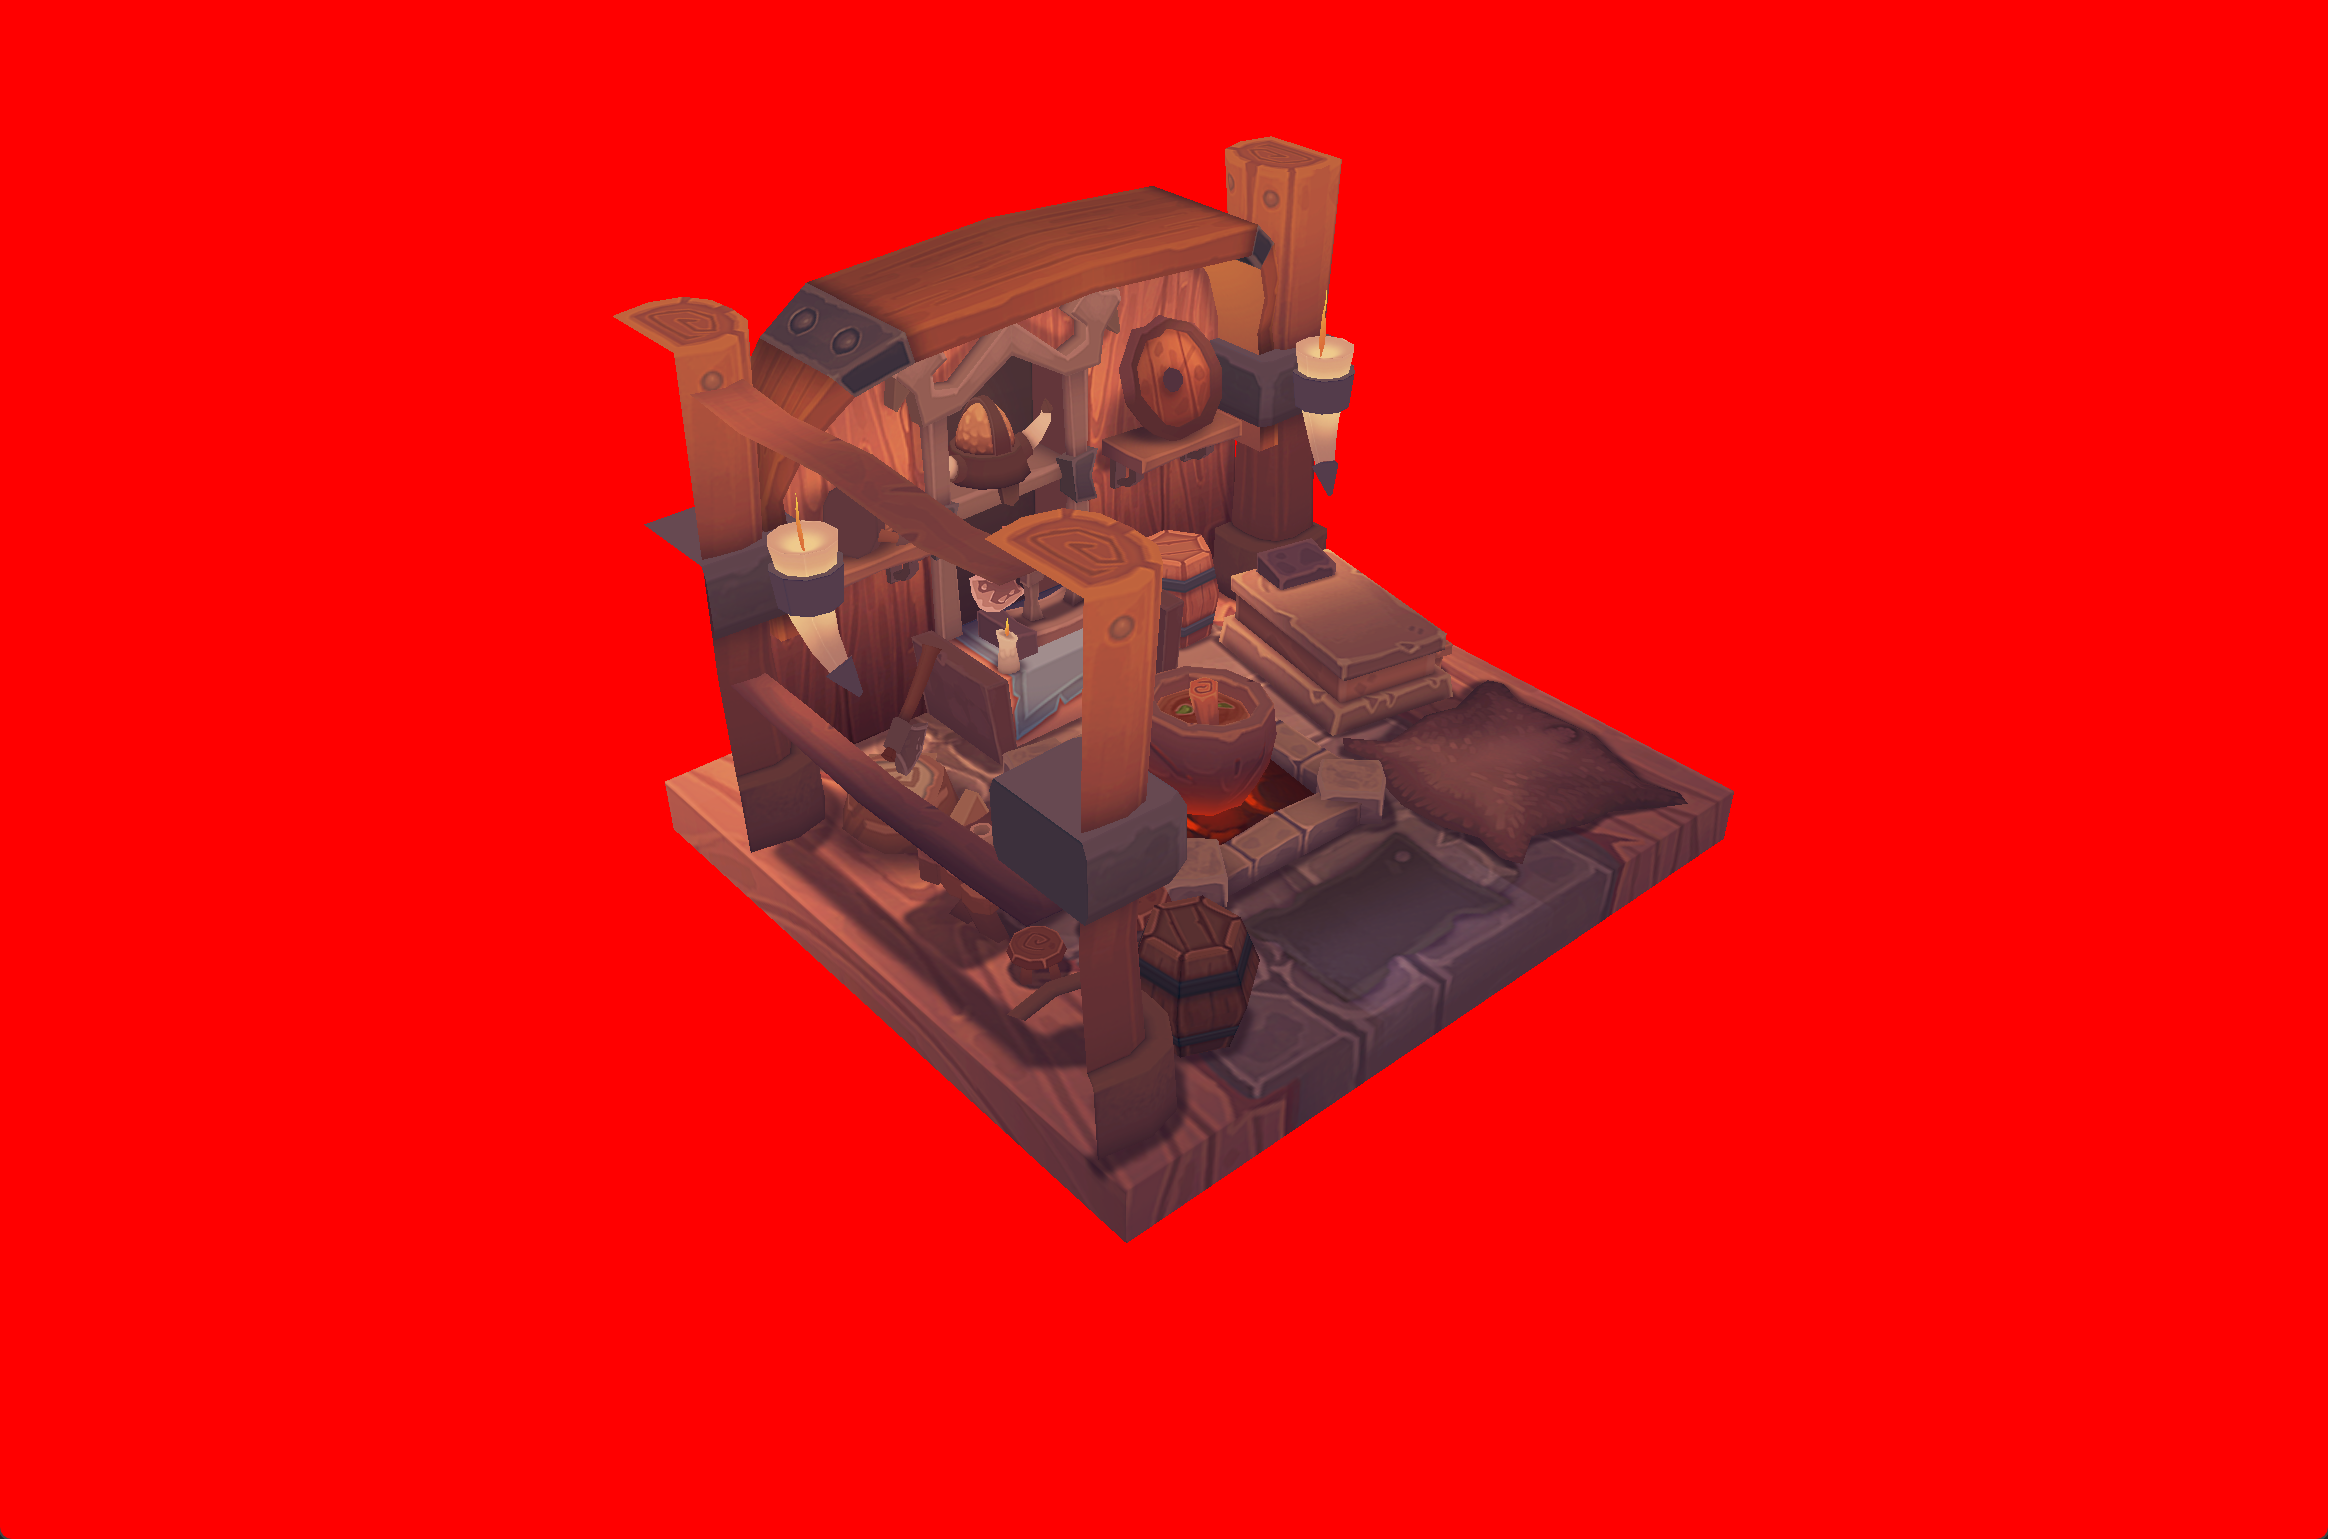
虽然目前的代码架构还比较丑陋,不过之后会不断重构优化。
关键代码在RHI/Platform/Vulkan文件夹中,Vulkan基础设施包括Instance、PhysicalDevice、Device、SwapChain、Surface都在VulkanContext中,渲染相关的部分在类GraphicsPipeline中,目前GraphicsPipeline通过虚函数RecordCommand来烘焙渲染命令,并在VulkanContext的Draw函数中每帧提交。
引擎入口在Tool/EngineApplication中,其中的Run负责每帧调用渲染指令。
集成ImGui
ImGui的下载
这个项目通过vcpkg管理依赖宝,因此只需要在vcpkg.json加入下面内容即可:
1
2
3
4
5
| {
"name" : "imgui",
"version>=" : "1.90.2",
"features" : [ "docking-experimental", "glfw-binding", "vulkan-binding" ]
}
|
这里docking-experimental是为了以后的docking窗口,glfw-binding支持了GLFW,vulkan-binding添加了Vulkan支持。
集成
下面开始集成ImGui。
ImGui属于一层UI,不与原本的任何渲染体系耦合,因此最好是专门为ImGui准备一套相应的基础设施(DescriptotPool,RenderPass,CommandBuffer,FrameBuffer,CommandPool)等,其底层的Instance,LogicalDevice等都可以使用已有的。
初始化
由于ImGui应该绘制在窗口最上层,因此我们再GlfwWindow中进行ImGui的初始化工作。
RenderPass
1
2
3
4
5
6
7
8
9
10
11
12
13
14
15
16
17
18
19
20
21
22
23
24
25
26
27
28
29
30
31
32
33
34
35
| vk::RenderPassCreateInfo ImGuiRenderPassProducer::GetRenderPassCreateInfo() {
vk::AttachmentDescription ColorAttachment;
ColorAttachment.format = mSwapchainImageFormat;
ColorAttachment.samples = vk::SampleCountFlagBits::e1;
ColorAttachment.loadOp = vk::AttachmentLoadOp::eLoad;
ColorAttachment.storeOp = vk::AttachmentStoreOp::eStore;
ColorAttachment.stencilLoadOp = vk::AttachmentLoadOp::eDontCare;
ColorAttachment.stencilStoreOp = vk::AttachmentStoreOp::eDontCare;
ColorAttachment.initialLayout = vk::ImageLayout::ePresentSrcKHR;
ColorAttachment.finalLayout = vk::ImageLayout::ePresentSrcKHR;
vk::AttachmentReference ColorAttachmentRef;
ColorAttachmentRef.attachment = 0;
ColorAttachmentRef.layout = vk::ImageLayout::eColorAttachmentOptimal;
vk::SubpassDescription Subpass;
Subpass.pipelineBindPoint = vk::PipelineBindPoint::eGraphics;
Subpass.setColorAttachments(mColorAttachmentRef);
vk::SubpassDependency Dependency;
Dependency.srcSubpass = VK_SUBPASS_EXTERNAL;
Dependency.dstSubpass = 0;
Dependency.srcStageMask = vk::PipelineStageFlagBits::eColorAttachmentOutput;
Dependency.dstStageMask = vk::PipelineStageFlagBits::eColorAttachmentOutput;
Dependency.srcAccessMask = vk::AccessFlagBits::eColorAttachmentWrite;
Dependency.dstAccessMask = vk::AccessFlagBits::eColorAttachmentWrite;
mAttachments = {ColorAttachment};
mSubpasses = {Subpass};
mDependencies = {Dependency};
vk::RenderPassCreateInfo RenderPassCreateInfo;
RenderPassCreateInfo.setAttachments(mAttachments).setSubpasses(mSubpasses).setDependencies(mDependencies);
return RenderPassCreateInfo;
}
|
由于ImGui是最上面的一层,所以直接在Present阶段进行绘制,此外ImGui是UI层,不需要深度,因此没有为其添加深度颜色附着。
GraphicsPipeline
创建一个ImGui需要的DescriptorPool:
1
2
3
4
5
6
| void ImGuiGraphicsPipeline::CreateDescriptorPool() {
vk::DescriptorPoolSize PoolSizes[] = {{vk::DescriptorType::eCombinedImageSampler, 1}};
vk::DescriptorPoolCreateInfo PoolCreateInfo;
PoolCreateInfo.setFlags(vk::DescriptorPoolCreateFlagBits::eFreeDescriptorSet).setMaxSets(1).setPoolSizes(PoolSizes);
mDescriptorPool = mContext.get().GetLogicalDevice()->GetHandle().createDescriptorPool(PoolCreateInfo);
}
|
这里的PoolSize只需要一个,用来创建字体,如果想要加入其他Texture需要修改PoolSize(参考:imgui/examples/example_glfw_vulkan/main.cpp at master · ocornut/imgui (github.com))。
创建一个专用的CommandPool:
1
2
| mCommandProducer =
RHI::Vulkan::CommandProducer::CreateUnique(mContext.get().GetLogicalDevice(), vk::CommandPoolCreateFlagBits::eResetCommandBuffer);
|
需要注意这里必须在创建时加上ResetCommandBuffer标志,这是因为之后提交渲染命令时每帧刷新而不是提前烘焙。
创建专门的RenderPass:
1
2
3
4
| const auto RenderPassProducer = ImGuiRenderPassProducer::CreateUnique(mContext.get().GetSwapChainImageFormat());
const auto RenderPassInfo = RenderPassProducer->GetRenderPassCreateInfo();
mRenderPass = RHI::Vulkan::RenderPass::CreateUnique(*mContext.get().GetLogicalDevice(), RenderPassInfo);
|
创建CommandBuffer这里的数量需要和交换链图像数量一致:
1
2
3
4
5
6
7
|
vk::CommandBufferAllocateInfo AllocInfo = {};
AllocInfo.setCommandPool(mContext.get().GetCommandProducer()->GetCommandPool())
.setLevel(vk::CommandBufferLevel::ePrimary)
.setCommandBufferCount(mContext.get().GetSwapChainImageCount());
mCommandBuffers = mContext.get().GetLogicalDevice()->GetHandle().allocateCommandBuffers(AllocInfo);
|
创建FrameBuffer数量也与交换链图像一致:
1
2
3
4
5
6
7
8
9
10
11
12
13
14
15
16
17
18
19
20
| void ImGuiGraphicsPipeline::CreateFramebuffers() {
using namespace RHI::Vulkan;
auto& Context = static_cast<VulkanContext&>(mContext);
mFramebuffers.resize(Context.GetSwapChainImageCount());
for (size_t i = 0; i < mFramebuffers.size(); i++) {
Array<vk::ImageView> Attachments;
Attachments = {
Context.GetSwapChainImageViews()[i]->GetHandle(),
};
vk::FramebufferCreateInfo FramebufferInfo = {};
FramebufferInfo
.setRenderPass(mRenderPass->GetHandle())
.setAttachments(Attachments)
.setWidth(Context.GetSwapChainExtent().width)
.setHeight(Context.GetSwapChainExtent().height)
.setLayers(1);
mFramebuffers[i] = Context.GetLogicalDevice()->GetHandle().createFramebuffer(FramebufferInfo);
}
}
|
创建专门的CommandBuffer:
1
2
3
4
5
6
7
| void ImGuiGraphicsPipeline::CreateCommandBuffers() {
vk::CommandBufferAllocateInfo AllocInfo = {};
AllocInfo.level = vk::CommandBufferLevel::ePrimary;
AllocInfo.commandPool = mCommandProducer->GetCommandPool();
AllocInfo.commandBufferCount = static_cast<uint32_t>(mFramebuffers.size());
mCommandBuffers = mContext.get().GetLogicalDevice()->GetHandle().allocateCommandBuffers(AllocInfo);
}
|
接下来便是初始化ImGui Vulkan部分:
1
2
3
4
5
6
7
8
9
10
11
12
13
14
15
16
17
18
| ImGui_ImplVulkan_InitInfo Info{};
Info.Instance = mContext.get().GetVulkanInstance()->GetHandle();
Info.PhysicalDevice = mContext.get().GetPhysicalDevice()->GetHandle();
Info.Device = mContext.get().GetLogicalDevice()->GetHandle();
Info.QueueFamily = mContext.get().GetPhysicalDevice()->FindQueueFamilyIndices().GraphicsFamily.value();
Info.Queue = mContext.get().GetLogicalDevice()->GetGraphicsQueue();
Info.PipelineCache = nullptr;
Info.DescriptorPool = mDescriptorPool;
Info.Subpass = 0;
Info.MinImageCount = mContext.get().GetSwapChainImageCount();
Info.ImageCount = mContext.get().GetSwapChainImageCount();
Info.MSAASamples = VK_SAMPLE_COUNT_1_BIT;
ImGui_ImplVulkan_LoadFunctions(
[](const char* Name, void* UserData) { return glfwGetInstanceProcAddress(static_cast<VkInstance>(UserData), Name); },
mContext.get().GetVulkanInstance()->GetHandle()
);
ImGui_ImplVulkan_Init(&Info, mRenderPass->GetHandle());
|
这样就算将ImGui初始化完成了。
那么ImGui::CreateContext()何时调用的呢?在GlfwWindow的InitImGui中:
1
2
3
4
5
6
7
8
9
10
11
| void GlfwWindow::InitImGui(Ref<RHI::Vulkan::VulkanContext> InContext) {
ImGui::CreateContext();
ImGui_ImplGlfw_InitForVulkan(mWindowHandle, true);
mGraphicsPipeline = MakeUnique<ImGuiGraphicsPipeline>(InContext);
Path DefaultFontPath = L"Fonts/Maple_UI.ttf";
AnsiString DefaultFontPathStr = DefaultFontPath.ToAnsiString();
ImGuiIO& IO = ImGui::GetIO();
IO.Fonts->AddFontFromFileTTF(DefaultFontPathStr.c_str(), 30, nullptr, IO.Fonts->GetGlyphRangesChineseSimplifiedCommon());
ImGui_ImplVulkan_CreateFontsTexture();
}
|
这里还加载了一个自定义字体,后面创建了字体纹理。
绘制
ImGui的绘制指令不是提前烘焙的,因此对于VulkanContext的绘制需要做出一些改变。
首先增加了IGraphicsPipeline接口,由GraphicsPipeline自行实现对渲染命令的提交:
1
2
3
4
5
6
7
8
9
10
11
12
13
| interface IGraphicsPipeline {
public:
virtual ~IGraphicsPipeline() = default;
virtual void SubmitGraphicsQueue(
int CurrentImageIndex,
vk::Queue InGraphicsQueue,
Array<vk::Semaphore> InWaitSemaphores,
Array<vk::Semaphore> InSingalSemaphores,
vk::Fence InFrameFence
) = 0;
};
|
因此对于原本的渲染房子的管线更改并不大,直接获取CommandBuffer进行绘制即可
1
2
3
4
5
6
7
8
9
10
11
12
13
| void GraphicsPipeline::SubmitGraphicsQueue(
int CurrentImageIndex, vk::Queue InGraphicsQueue, Array<vk::Semaphore> InWaitSemaphores, Array<vk::Semaphore> InSingalSemaphores,
vk::Fence InFrameFence
) {
auto CmdBuffer = GetCurrentImageCommandBuffer(CurrentImageIndex);
vk::SubmitInfo SubmitInfo = {};
vk::PipelineStageFlags WaitFlag = vk::PipelineStageFlagBits::eColorAttachmentOutput;
SubmitInfo.setCommandBuffers(CmdBuffer)
.setWaitSemaphores(InWaitSemaphores)
.setSignalSemaphores(InSingalSemaphores)
.setWaitDstStageMask(WaitFlag);
InGraphicsQueue.submit(SubmitInfo, InFrameFence);
}
|
而对于ImGuiGraphicsPipeline(这个类集成了初始化操作),每帧重新对需要的CommandBuffer进行记录即可:
1
2
3
4
5
6
7
8
9
10
11
12
13
14
15
16
17
18
19
20
21
22
23
24
25
26
27
28
| void ImGuiGraphicsPipeline::SubmitGraphicsQueue(
int CurrentImageIndex, vk::Queue InGraphicsQueue, Array<vk::Semaphore> InWaitSemaphores, Array<vk::Semaphore> InSingalSemaphores,
vk::Fence InFrameFence
) {
vk::CommandBufferBeginInfo BeginInfo = {};
BeginInfo.setFlags(vk::CommandBufferUsageFlagBits::eOneTimeSubmit);
mCommandBuffers[CurrentImageIndex].begin(&BeginInfo);
vk::RenderPassBeginInfo RenderPassInfo = {};
StaticArray<vk::ClearValue, 1> ClearValues = {};
RenderPassInfo.renderPass = mRenderPass->GetHandle();
RenderPassInfo.framebuffer = mFramebuffers[CurrentImageIndex];
RenderPassInfo.renderArea = vk::Rect2D{{0, 0}, mContext.get().GetSwapChainExtent()};
RenderPassInfo.clearValueCount = static_cast<uint32_t>(ClearValues.size());
RenderPassInfo.pClearValues = ClearValues.data();
mCommandBuffers[CurrentImageIndex].beginRenderPass(RenderPassInfo, vk::SubpassContents::eInline);
ImGui::Render();
ImGui_ImplVulkan_RenderDrawData(ImGui::GetDrawData(), mCommandBuffers[CurrentImageIndex]);
mCommandBuffers[CurrentImageIndex].endRenderPass();
mCommandBuffers[CurrentImageIndex].end();
vk::PipelineStageFlags WaitFlag = vk::PipelineStageFlagBits::eColorAttachmentOutput;
vk::SubmitInfo Info = {};
Info.setSignalSemaphores(InSingalSemaphores)
.setWaitSemaphores(InWaitSemaphores)
.setCommandBuffers(mCommandBuffers[CurrentImageIndex])
.setWaitDstStageMask(WaitFlag);
Info.waitSemaphoreCount = 0;
InGraphicsQueue.submit(Info);
}
|
需要注意的是这里渲染命令提交时,并没有加入Fence参数,这样会让验证层报错。这里的不一致性目前我还没有找到何时的解决方法,mark一下。
此外需要的VulkanContext的Draw进行修改,由于渲染时原本的渲染Pass和ImGui Pass完全独立,因此我们需要等待两个都渲染完成了再进行呈现,但是这两者没有前后顺序关系,因此每帧创建多个Semphore来进行同步:
1
2
3
4
5
6
7
8
9
10
11
12
13
14
15
16
17
18
| Array WaitSemaphores = {mImageAvailableSemaphores[mCurrentFrame]};
Array<vk::Semaphore> SingalSemaphores = {};
constexpr vk::SemaphoreCreateInfo SemaphoreInfo = {};
for (auto& Pipeline: mRenderGraphicsPipelines) {
SingalSemaphores.push_back(Device.createSemaphore(SemaphoreInfo));
}
for (int i = 0; i < mRenderGraphicsPipelines.size(); i++) {
mRenderGraphicsPipelines[i]->SubmitGraphicsQueue(
ImageIndex, mLogicalDevice->GetGraphicsQueue(), WaitSemaphores, {SingalSemaphores[i]}, mInFlightFences[mCurrentFrame]
);
}
vk::PresentInfoKHR PresentInfo = {};
StaticArray SwapChains = {mSwapChain->GetHandle()};
PresentInfo.setWaitSemaphores(SingalSemaphores).setSwapchains(SwapChains).setImageIndices(ImageIndex);
|
可以看到,所有渲染管线都等待当前图像可用的同步了,同时为每一个渲染管线指定一个需要它激活的Semphore,在呈现时等待这些Semphore即可达到我们想要的效果。
清理
清理工作只要按照初始化相反顺序进行即可。
处理窗口大小变化
窗口大小改变时我们需要重建交换链,依赖于此的渲染管线也需要重建。因此我们向IGraphicsPipeline添加一个Rebuild接口:
1
2
3
4
5
6
7
8
9
10
11
12
13
14
15
16
| interface IGraphicsPipeline {
public:
virtual ~IGraphicsPipeline() = default;
virtual void SubmitGraphicsQueue(
int CurrentImageIndex,
vk::Queue InGraphicsQueue,
Array<vk::Semaphore> InWaitSemaphores,
Array<vk::Semaphore> InSingalSemaphores,
vk::Fence InFrameFence
) = 0;
virtual void Rebuild() = 0;
};
|
对于原本的GraphicsPipeline只需要清理再重新初始化即可:
1
2
3
4
| void GraphicsPipeline::Rebuild() {
Finalize();
Initialize();
}
|
对于ImGuiGraphicsPipeline只需要重建FrameBuffer即可,这是因为RenderPassBeginInfo需要FrameBuffer参数同时FrameBuffer依赖与交换链图像视图,我们重新创建了交换链图像视图也就需要重建FrameBuffer。但是这里会让绘制的ImGui窗口不会跟随窗口大小改变而适应,考虑到ImGui只用来做工具界面并且其本身具有灵活的改变位置、缩放的功能,因此也就没有强制要求自适应变化:
1
2
3
4
| void ImGuiGraphicsPipeline::Rebuild() {
CleanFramebuffers();
CreateFramebuffers();
}
|
效果
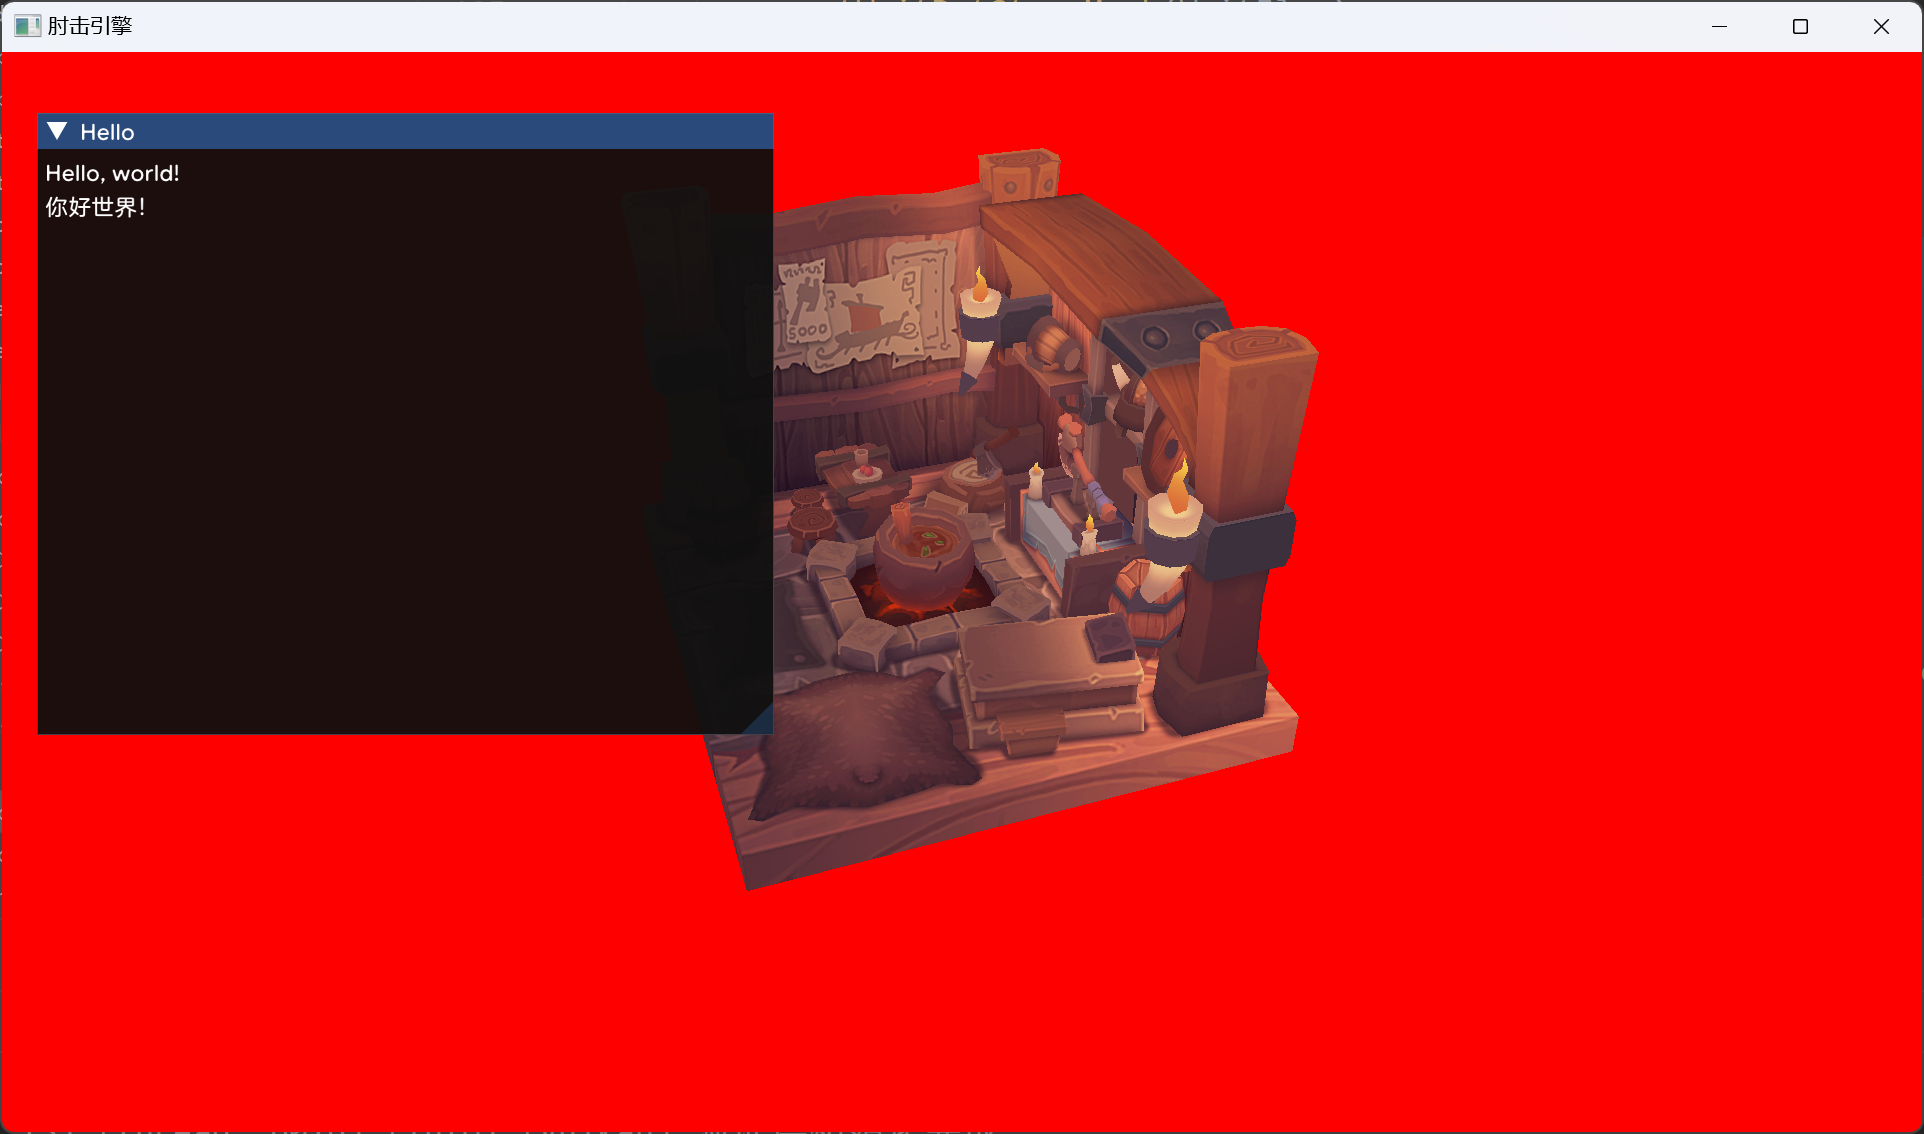
可以看到ImGui按照预期集成。
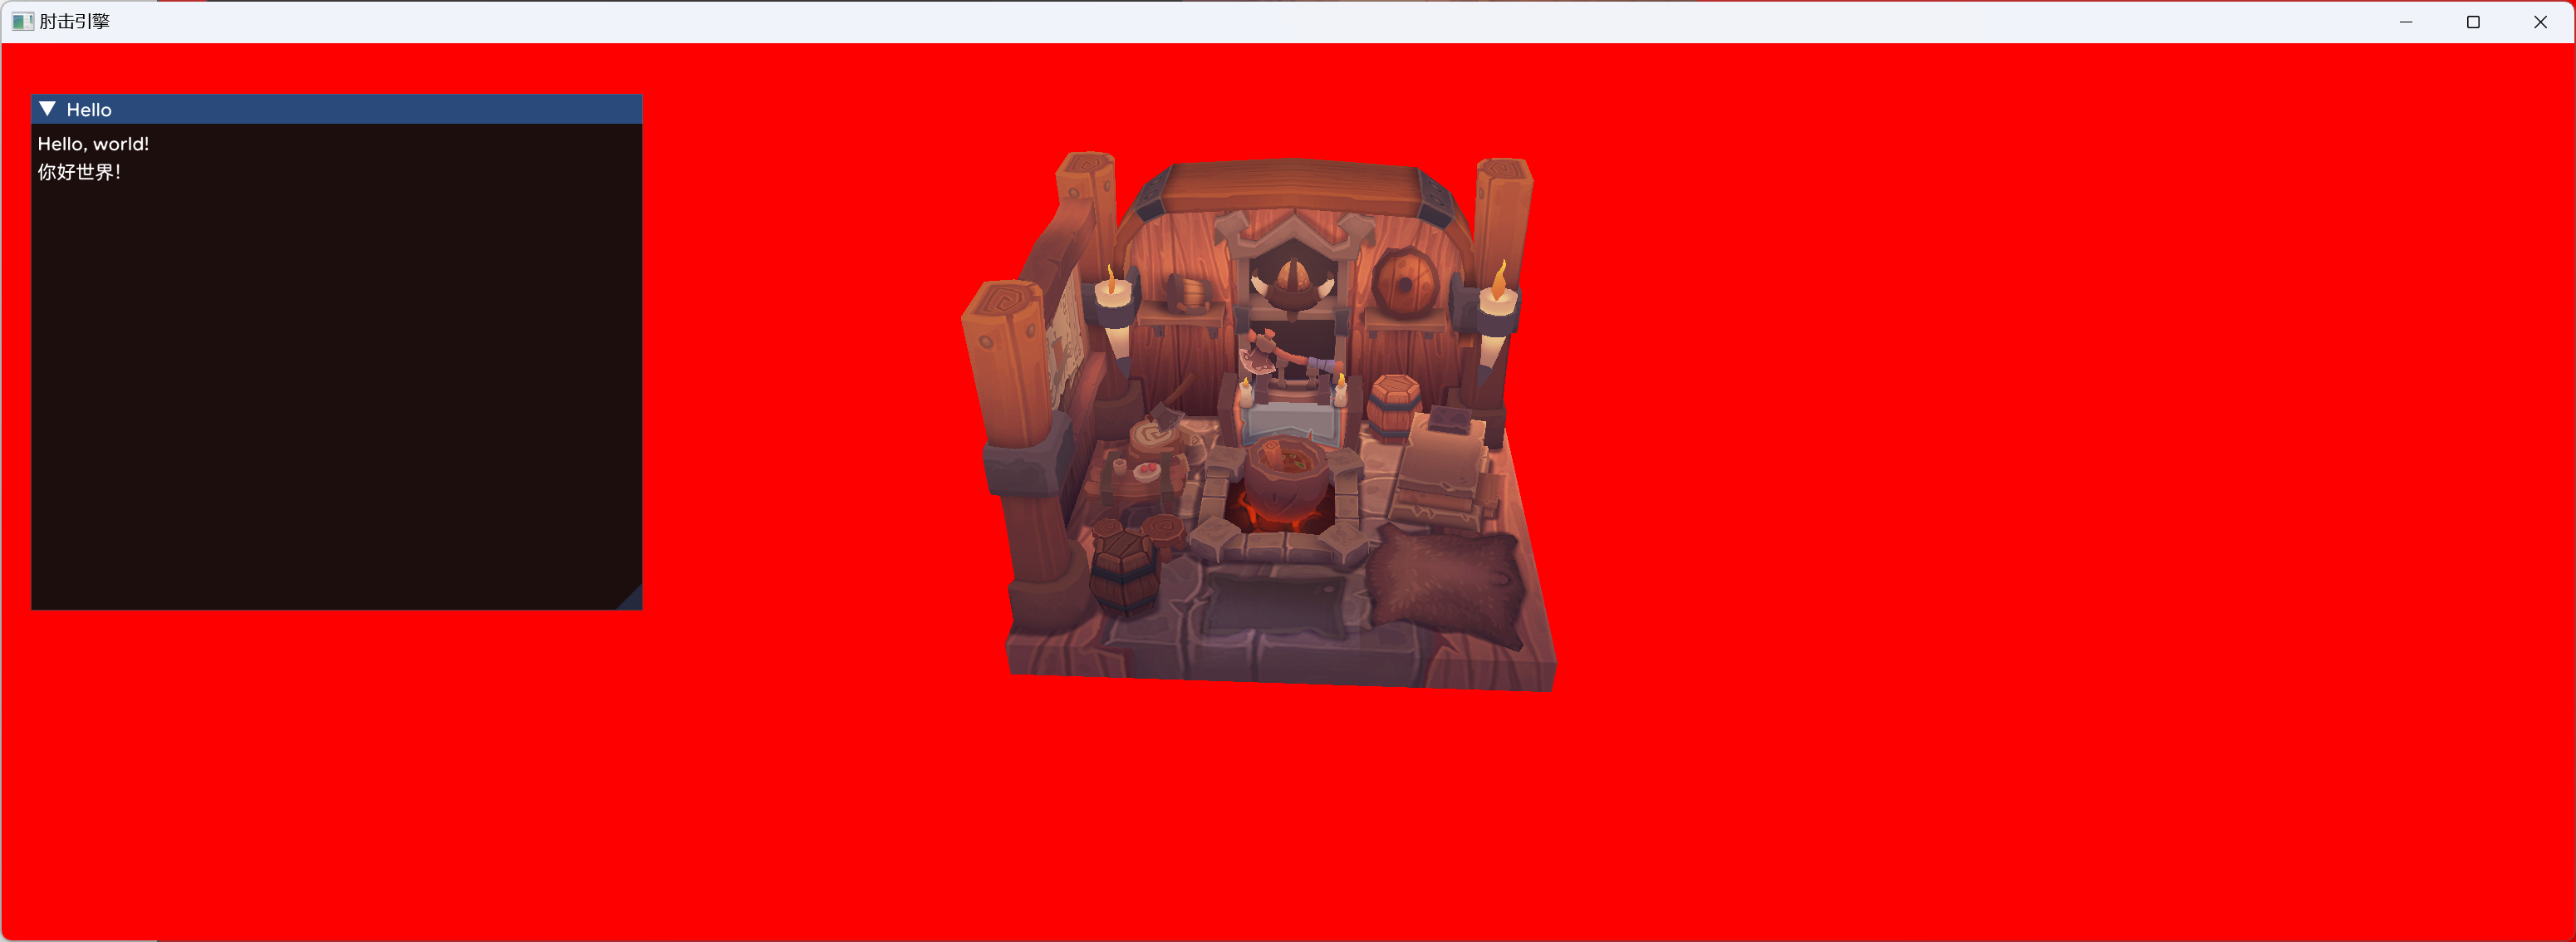
当窗口大小改变时,我们渲染的3D物品很好的适应了变化,但是ImGui窗口的位置、缩放仍然没有变化。
结语
本篇博客所有的代码都在RickSchanze/ElbowEngine at 集成Imgui (github.com)集成ImGui分支,可以在这里查看。
由于对于Vulkan的不熟悉,集成工作耗费了我一天,我不断的查阅资料终于成功了,还是很开心的。
引用
- Vulkan版Dear ImGui的接入和使用教程 - 知乎 (zhihu.com)
- imgui/examples/example_glfw_vulkan/main.cpp at master · ocornut/imgui (github.com)
- Vulkan and multiple render passes ordering : r/vulkan (reddit.com)


